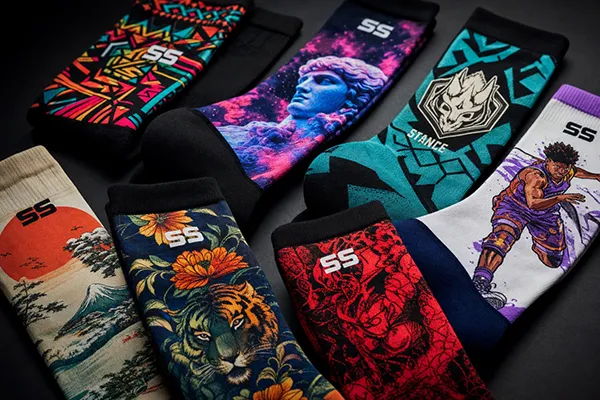
360 sock printing gives designers a seamless canvas, but it also introduces new ways to go wrong. These are the design mistakes we see most often, with simple fixes.
Mistake 1: Wrong template width
Artwork must match the stretched circumference of the sock on its roller. Use the template for the exact roller size. A wrong width causes gaps or overlaps at the join. See 360 sock printer rollers.
Mistake 2: Visible join
Designs that do not continue across the left and right edges show a line. Fix it by offsetting the artwork horizontally by half its width and repairing the seam before printing.
Mistake 3: Faces on the heel
The heel stretches most when worn, distorting anything placed there. Place faces, logos and text on the leg or cuff.
Mistake 4: Tiny text
Text that looks fine on screen becomes unreadable on a sock. Use bold fonts at sufficient size.
Mistake 5: Hairline strokes
Thin lines, especially light-on-dark, can disappear or break up. Thicken strokes.
Mistake 6: Low-resolution images
Upscaled web images print soft and pixelated. Use original high-resolution files or vector art.
Mistake 7: Screen-only colors
Neon screen colors may print duller on fabric. Use a printed color book to choose achievable colors. See socks printer color management.
Mistake 8: Ignoring left and right
Mirrored designs need separate files. Decide early and name files clearly.
Mistake 9: Overcrowding
Too many elements compete for attention when the sock is worn. Keep a clear focal point on the visible leg area.
Mistake 10: Not testing
Always print, fix and wear-test new designs before launching. Digital printing makes testing cheap.
A quick pre-print checklist
- Correct template for roller size.
- Seamless join checked.
- Focal point on leg, not heel.
- Text bold and legible.
- Images at sufficient resolution.
- Colors chosen from printed swatches.
- Left/right files named correctly.
Designing for different sock sizes
Many collections are offered in several sizes. A design built for an adult men's sock will not simply scale to a kids' sock without problems: details may become too small, text unreadable and the join may misalign because the template width changes. Build each size from its own template, and adjust element sizes so the design reads well at each scale. Keep focal elements proportionate rather than shrinking everything uniformly.
Working with clients' artwork
Clients often supply artwork that was designed for flat products such as T-shirts or posters. Before printing, review it for 360° suitability:
- Is there enough background to wrap around the sock?
- Will the main subject land on the leg rather than the heel?
- Are logos supplied in vector format?
- Do colors fall within the printable range on fabric?
Explaining these adjustments to clients, and showing a mockup on a sock template, prevents disappointment and makes you look more professional than a supplier who simply prints whatever arrives.
Keep a design library
Save approved templates, backgrounds and pattern tiles in a shared library. Reusing tested components speeds up new designs and reduces mistakes.
Checking designs before printing
A quick review catches most mistakes. Print a proof on a test sock or view a mockup that shows the design stretched on a foot, then check:
- Does the seam line join cleanly?
- Are faces, text and logos clear of the heel and toe?
- Do colors match what the customer approved?
- Does the pattern scale correctly on every size?
- Is resolution sufficient at final size?
Build this into your workflow as a fixed step, especially for new customers.
Learning from mistakes
Keep a folder of misprints with notes on what went wrong. Use it to train designers and operators. Over time you will see the same few mistakes repeat, and you can update templates or checklists to prevent them.
Working with customers' designers
Many customers supply their own artwork. Send them your template, a short guide and examples of what works. A few minutes of guidance up front saves hours of revisions. See preparing artwork for a socks printer, designing custom printed socks that sell and examples on the custom printed socks page.
Reviewing popular designs
Look at your best sellers and note what they share: clear subjects, strong contrast, colors that print well. Use these lessons as a guide for new 360 sock printing designs, alongside customer feedback.
Testing a few new designs each month keeps the range fresh without overloading production.
Frequently asked questions
Where should the join be placed?
With good preparation it can be anywhere; many designers place it at the back of the leg.
How do I test stretch distortion?
Print a grid pattern and wear the sock.
Should cuffs be printed?
Yes, but rib structures may print slightly differently; test first.
Conclusion
Most 360 sock printing design problems come from templates, joins, placement and resolution. Use a checklist and test on real socks. Learn more in preparing artwork for a socks printer, see examples in our applications gallery, or contact us for templates.
Leave A Comment