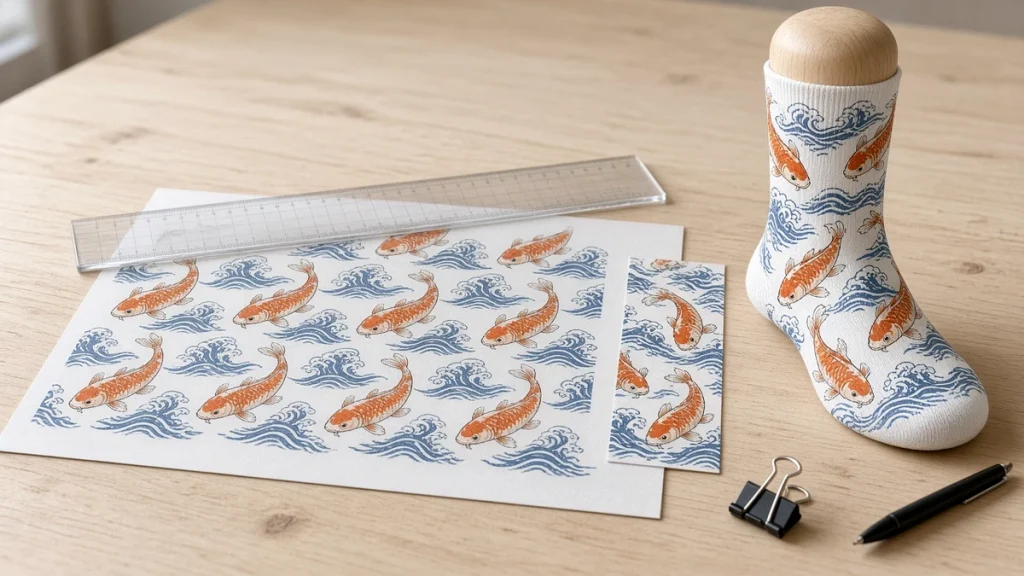
Great socks start with great files. Artwork that looks perfect on screen can print with a visible join, distorted faces or pixelated edges if it is not prepared for rotary printing. This guide covers the essentials of preparing files for a socks printer so designs print cleanly the first time.
Understand the canvas
On a socks printer, the sock is a tube on a roller. When you unroll that tube mentally, you get a rectangle:
- Width equals the circumference of the stretched sock on the roller.
- Height equals the printable length from cuff to toe.
Each roller size has its own template width. Always design on the template for the roller and sock size you will use. Ask your supplier for templates or measure carefully and create your own.
Mark the zones
Add guide layers to your template showing:
- Cuff: often the area people see first; good for logos and names.
- Leg: the main display area.
- Heel: stretches significantly when worn; avoid placing faces or text here.
- Foot and toe: hidden in shoes; often used for patterns or fun details.
Knowing the zones prevents a beautiful pet portrait from ending up stretched across the heel.
Resolution
Use raster images at sufficient resolution for the final printed size. Low-resolution images look soft or pixelated, especially on fine details like text and outlines. Vector artwork for logos and text keeps edges crisp. Avoid upscaling small web images; ask clients for original files.
Color mode and profiles
Design in the color mode your workflow expects and let the RIP handle conversion with the correct profile. Avoid relying on very bright screen colors that may be outside the printable range on fabric. Our guide to socks printer color management explains why.
Making the wraparound invisible
Because the left and right edges meet, the design must continue seamlessly across that join:
- Seamless patterns: use pattern tiles that repeat horizontally, with the template width equal to a whole number of repeats.
- Illustrations: extend backgrounds past the edge and check the join by offsetting the image horizontally by half its width.
- Solid backgrounds: easy, but check that gradients match at the join.
Many designers place the join at the back of the leg, where it is least noticeable, though with good preparation it should be invisible anywhere.
Distortion and stretch
The sock is printed at roller stretch and worn at foot stretch, which varies by person and area. Circles can become ovals; text can widen. Test critical designs such as faces and logos on real socks and adjust proportions if needed.
Left and right socks
Decide whether pairs should be identical, mirrored or different. Mirrored designs, such as faces looking inward, need separate files. Name files clearly, for example with "L" and "R".
Text and fine lines
- Keep text above a minimum size so it remains legible after stretching.
- Avoid hairline strokes, especially in light colors on dark backgrounds.
- Outline fonts or embed them to avoid substitution.
File naming and organization
For production, consistent naming saves hours: include design name, size and version. For print on demand, include order numbers. Organized files flow smoothly into the RIP queue; see RIP software and your socks printer.
Common mistakes
- Designing on the wrong template width.
- Forgetting the heel stretch zone.
- Using low-resolution images.
- Leaving white gaps at the join.
- Assuming screen colors will print exactly.
More design guidance is in designing custom printed socks that sell and 360 sock printing design mistakes to avoid.
A file checklist before sending to print
Most artwork problems can be caught before the socks printer starts. Check every file for:
- Correct template size for the sock size and roller in use.
- Sufficient resolution at final print size, especially for photos.
- Wrap continuity: the left and right edges must meet cleanly where the design joins.
- Safe zones: important text and faces away from the heel, toe and cuff, where stretch distorts shapes.
- Color mode and profile as specified by your RIP workflow.
- No stray layers, hidden objects or unintended transparency.
Working with customer artwork
Customers often send logos as small web images or photos taken on a phone. Ask for vector logos or high-resolution files, and explain why. If only a low-quality file is available, show a proof and agree before printing. Our photo personalized socks guide explains how to judge photos.
Templates save time
Build master templates for each size, with guides for the heel, toe, cuff and seam. Share them with designers and customers. A consistent template reduces back-and-forth and makes reorders simple.
Design for the medium
Knitted fabric stretches, so very fine lines and tiny text can break up. Bold shapes, strong contrast and patterns that tolerate stretch look best. See 360 sock printing design mistakes to avoid and designing custom printed socks that sell for more ideas.
Keeping files organized
Store approved files with clear names linking them to customers and orders, and keep a copy of the final proof. When a customer reorders months later, you can print exactly the same design without rebuilding it.
Conclusion
Prepare artwork on the correct template, respect the heel and toe zones, use sufficient resolution and check the wraparound join. These habits make a socks printer produce clean results every time. For inspiration, browse our custom art socks and applications pages, or contact us to request templates.
Leave A Comment