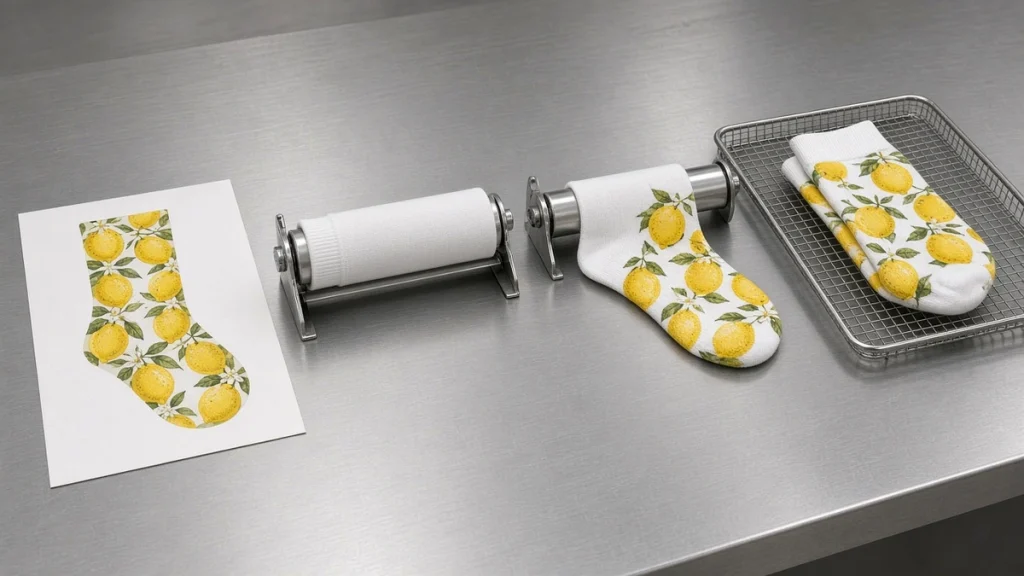
360 digital socks printing combines digital design, rotary inkjet printing and textile finishing into one workflow. Each step affects the final result, and skipping checks at any stage can lead to reprints. This step-by-step overview includes practical checkpoints for both polyester and cotton routes.
Step 1: Order and brief
Collect the essentials: design, sock size, fabric, quantity, deadline and any color references. For personalized orders, collect names or photos and check image quality immediately.
Checkpoint: is every required detail present before work begins?
Step 2: Artwork on template
Place artwork on the template matching the roller size. Mark cuff, heel and toe zones and ensure the left and right edges join seamlessly.
Checkpoint: offset the image by half its width to check the join.
See preparing artwork for a socks printer.
Step 3: RIP processing
Load the file into the RIP, select the profile for the fabric and ink, choose the print mode and add the job to the queue grouped by size.
Checkpoint: correct profile and mode selected; job named by order or SKU.
Step 4: Blank preparation
Polyester: blanks are usually ready to print.
Cotton: pretreat and dry blanks evenly before printing.
Checkpoint: blanks of the correct size, clean and consistent. Read choosing blank socks for digital printing.
Step 5: Loading
Pull the sock over the roller, align knit lines, remove twist and smooth the fabric.
Checkpoint: no twist, even stretch, correct orientation of heel and toe.
Step 6: Printing
The roller rotates while the carriage moves, laying down the design around the sock.
Checkpoint: inspect the first print of each job before continuing. Run a nozzle check at the start of each shift.
Step 7: Fixation
Polyester: heat-fix in an oven such as the COHE-1801 chain oven.
Cotton: steam in a steamer such as the COST-1802 or fix in a low-temperature oven such as the COHE-1803.
Checkpoint: verify temperature and time settings daily.
Step 8: Washing and drying (cotton)
Wash out unfixed dye and chemicals in a washer, dewater in a spin dryer, then tumble dry.
Checkpoint: no bleeding in rinse water after the final rinse; socks fully dry before packing.
Step 9: Inspection
Check design accuracy, color, the wraparound join, size and defects under consistent lighting.
Checkpoint: compare first pairs of each reorder with the approved sample.
Step 10: Packing and shipping
Pair socks, attach labels or packaging and ship. For online orders, update tracking in batches.
Keeping records
For every job, record file version, profile, print mode, fixation settings and blank batch. Records make reorders match and help diagnose issues.
Where time is lost
- Searching for files with inconsistent names.
- Roller changes due to unsorted queues.
- Waiting for ovens or dryers that are undersized.
- Reprints caused by loading mistakes.
Fix these and the whole 360 digital socks printing workflow speeds up. Our article on planning a production line helps with capacity.
Roles in the workflow
In a small shop one person may cover every step. As volume grows, it helps to assign clear roles:
- Prepress: checks artwork, prepares wrap files and assigns RIP presets.
- Printer operator: loads socks, runs print jobs, performs nozzle checks and daily maintenance.
- Finishing: manages fixation and, for cotton, washing and drying.
- Quality and packing: inspects every pair, pairs them correctly and packs orders.
Clear roles reduce mistakes and make training easier.
Quality checkpoints
Add short checks at each handover: file approved before printing, print checked before fixation, finished socks checked before packing. Catching a problem early avoids wasting fixation time and blanks.
Timing and batching
Group jobs by fiber and roller size. Polyester jobs go straight to the oven after printing, while cotton jobs move to steaming, washing and drying. Running polyester while cotton goes through finishing keeps equipment busy. See planning a production line.
Records
Log each batch with date, design, blank, settings and operator. These records help with reorders and troubleshooting.
Improving over time
Review the workflow monthly: where did orders wait, which defects occurred, which steps took longest? Small adjustments, such as a better staging table or clearer labels, often produce noticeable gains. Our operator training plan and the production process page offer more detail.
Involve operators in these reviews; the people doing the work usually know where time is lost.
Frequently asked questions
How long does one pair take from file to finished?
Polyester can be finished the same day; cotton takes longer due to washing and drying. Exact times depend on equipment and batch sizes.
Can polyester and cotton run on the same line?
They share printing principles but need different inks and finishing. Many businesses run separate zones.
Where should quality checks happen?
At artwork, first print, after fixation and at final inspection.
Conclusion
A clear 360 digital socks printing workflow with checkpoints at each step keeps quality high and reprints low. Standardize templates, profiles, loading and fixation, and keep records. See the workflow in action on our production process page or contact us.
Leave A Comment